

3 Ways of Attaching to Existing Browsers in Web Automation
Attach existing browser by selenium, playwright and clicknium


Overview
For web automation, there are common scenarios containing end-to-end automation without human intervention, headless browser automation, and partial automation.
Partial automation means that not the entire business process is automated, and some may be operated by humans in advance due to security concerns, complex operations which are not repetitive but time-consuming etc. In this automation case, the browser is opened and the relevant preparation work will be done by the human, and then the automation script will be executed for the repetitive part.
In this case, attaching the existing browser is necessary for the automation script to handle the same browser which human works on. We are introducing the browser attaching method for different automation libraries here, containing Selenium, Playwright and Clicknium.
Selenium attaches to existing browser
Requirements
- Download ChromeDriver from here, you need to select the same version of chromedriver.exe with your installed chrome browser, which you could see it by
chrome://versionin chrome browser. - Place the chromedriver.exe in the same folder as Chrome.exe. For example, if your Chrome browser file path is
C:\Program Files\Google\Chrome\Application\chrome.exe, then the chromedriver.exe could be accessed withC:\Program Files\Google\Chrome\Application\chromedriver.exe. - The browser that need to be attached should be started with argument
--remote-debugging-port, and you also need to operate on this browser. The command looks like this:"C:\Program Files\Google\Chrome\Application\chrome.exe" --remote-debugging-port=8888 - Notice that if there are other Chrome browsers running in the same time, it is better to close the others and keep the only one that you want to attach later, or the Selenium script might not successfully attach to the right browser, or the page that you want to automate may get refreshed when attaching.
Code
The idea is to start a Chrome instance by specifying the option of debugger_address, the port in the address is what we specified in the command before. And then get to the page which you want to run Selenium automation script after attaching.
from selenium import webdriver
from selenium.webdriver import ChromeOptions
from selenium.webdriver.chrome.service import Service

options = ChromeOptions()
options.debugger_address = "127.0.0.1:" + '8888'
browser = webdriver.Chrome(service=Service(executable_path="C:\\Program Files\\Google\\Chrome\\Application\\chromedriver.exe"), options=options)
browser.get("https://contoso.com/u/0/#in?compose=new")
Playwright attaches to existing browser
Requirements
- Run
playwright installto init the playwright prerequisites - The browser that need to be attached should be started with argument
--remote-debugging-port, and you also need to operate on this browser. The command looks like this:"C:\Program Files\Google\Chrome\Application\chrome.exe" --remote-debugging-port=8888 - Notice that if there are other Chrome browsers running in the same time, it is better to close the others and keep the only one that you want to attach later. And if there are multiple windows opened from the browser started by above command, it is better to keep one page with the Url that you want to automate to avoid attaching to non-target page.
Code
Playwright provides two ways to attach to existing browsers: connect and connect_over_cdp. The connect needs to work with launchServer in Node.js, so we will use connect_over_cdp in python for manually started Chrome browser. The code is as below:
from playwright.sync_api import sync_playwright

with sync_playwright() as p:
    browser = p.chromium.connect_over_cdp("http://localhost:8888")
    default_context = browser.contexts[0]
    page = default_context.pages[0]
Clicknium attaches to exsiting browser
Requirements
- Install Clicknium VSCode Extension and python module
pip install clicknium - Install Clicknium browser extension, there are two ways of doing this:
- Install via python:
import clicknium as cc cc.chrome.extension.install() - Install via VSCode extension UI:
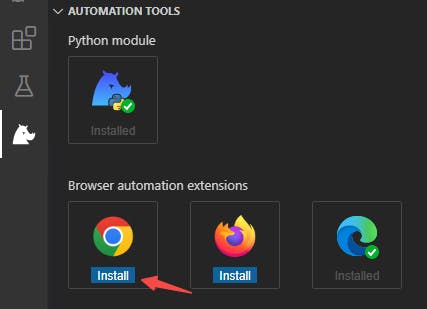
- Install via python:
- Notice that the browser extension need to be enabled after installation.
Code
Clicknium provides two ways to attach existing browser, attach and attach_by_title_url. The attach is to attach a browser by a web element specified in the target browser. The attach_by_title_url is to attach to a target browser by title or url, this is more flexible if the target page element could be dynamically changed. The code is as below: (we may use wildcard * if part of the url may change)
from clicknium import clicknium as cc, locator
browser = cc.chrome.attach_by_title_url(ulr='https://contoso.com/u/0/in?id=*')
#browser.find_element(locator.hundun.img)
Compare
| Area | Selenium | Playwright | Clicknium |
| Requirements | ChromeDriver.exe need to be installed. Chrome browser need to be started with remote debug option. | Chrome browser need to be started with remote debug option. | Clicknium browser extension need to be installed and enabled. |
| Browser Instance | One | One | Multiple |
| Attach Method | Start browser with option and chromedriver.exe to attach to target browser. | Connect to target browser by debugger port, get page by index. | Attach to target web page by web element, page title or url. |